 5824
5824
- Create a new GPO and link it to the User OU or Domain that contains the users that will need to receive the drive mapping.
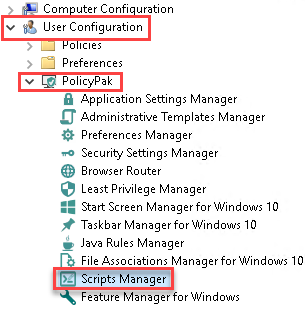
- Edit the GPO and expand the User Configuration > PolicyPak > Scripts Manager Section.
- With the Scripts Manager section selected click “ADD NEW COLLECTION” then give the collection a descriptive name, and click OK.
- Next either select the collection name under the left side of the screen or double-click on the collection name to open the collection.
- With the collection name selected click “ADD NEW POLICY”.
- Click Next to get to the “On apply action” screen, then choose “PowerShell script” from the dropdown menu.
-
Next, paste in the script below to the text window, and ensure that “Run script as user” is the only option checked.
if (-not(get-psdrive -name "Z" -ErrorAction SilentlyContinue)) {

	New-PSDrive -name "Z" -PSProvider FileSystem -Root \\server\share -Persist

	}
Remember to edit the script to match what is needed for your environment, replacing “Z” with the drive letter you wish to map, for example if you want to map H: then replace “Z” with “H”. Also, replace \\server\share with the UNC path of the share you wish to map.
The “On apply action” screen should look similar to below:
- Then click Next, then Next again (skipping the “On revert action”screen) until you get to the “Specify process mode” screen. Ensure that the “Always” radio button is selected then click Next, give the policy a descriptive name, then click Finish.
-
Test the policy by logging into a domain-joined computer with a domain user account from the (User) OU or Domain where this GPO is linked then run “gpupdate”, afterward open File Explorer and verify that you see the new drive mapping.
Tip: If using PolicyPak Scripts Manager VPN Triggers to map drives on VPN connect you may need to add a delay to allow DNS to be updated before the drives are mapped, (i.e. to wait 15 seconds use "Start-Sleep -s 15" for PowerShell, or "Timeout /T 15 >nul" for Batch files.
If you do not see the drive mapping in File Explorer but can see the drive mapping when running "Net Use" from the CMD prompt try enabling the "Launch folder windows in a separate process" option (see image below) to see if that resolves the issue.


